Expedition Buddy: Quiet Downs

Note: This post was originally published on the now-defunct Wildstar-Core. Although it will be a while until Shade’s Eve starts back up again, I wanted to archive this here for posterity.


Quiet Downs is the Shade’s Eve seasonal expedition. It is a great way to earn seasonal goodies like decor, costumes, and mount flair! To get the most enjoyment of the spooky ambiance, I’d recommend trying it once before reading this guide. Spoilers ahoy!

Spoooooooky!

Spoooooooky!

What: Escape from a spooky forest, and discover the spooky mysteries of the town of Quiet Downs.

When: Only during Shade’s Eve, available at level 10.

Where: Thayd/Illium

Gold Timers: No overall timer, but there is a 5 minute timer to find the fountain in the first section.

Expedition Buddy Says: This expedition has 3 major sections. First, you need to escape the woods, then investigate the town, and finally wreck up an evil lair. Let’s get started!

If you are doing this for the daily quest you currently need to enter through the portal in Thayd/Illium for it to count. Otherwise you can use the group finder to queue like any other expedition. After the cutscene, you will spawn in a very dark wood. There are multiple different spawn locations, which are chosen randomly. If you enter with a group you will likely all spawn in different places and have to find each other. Your goal is to make it to the fountain, which is roughly in the center of the map. To make it extra difficult, your minimap works but doesn’t highlight the fountain, and pressing “m” to bring up the full map will show your location but not any of the details of the terrain.

This dark ominous path actually leads directly out of the woods

This dark ominous path actually leads directly out of the woods

This is the part where you’d probably like me to tell you exactly how to find that fountain, but since the starting locations are always changing and everything is super dark that’s very difficult! I will tell you that you are aiming for the center of the map, and that the fastest path is often slightly hidden or small. The fountain is also slightly higher up than the starting points, so keep an eye out for changes in elevation. There are a few places where the “correct” path might involve a switchback up a small hill. If you start running into bear traps you’re getting close! It will probably take you a couple runs to learn the maze, and that’s ok! The other helpful thing is that after the 5 minute timer expires, the Angel will start helping you. Just follow the big glowing will-o-the-wisps and they’ll lead you to your destination.

Your flashlight, Anti-shadeling flare, and signal beacon

Your flashlight, Anti-shadeling flare, and signal beacon

You’ll also lose access to your normal abilities for this section. Instead, you have 3 new ones, a flashlight, a small anti-shadeling flare, and a signal flare/beacon. The flashlight is your best friend. It will illuminate a small region in front of you and help you avoid the many many traps and dangerous plants on the ground. It will only last for 20 seconds, and then you’ll be stuck in 5 seconds of darkness waiting for it to recharge. The flare will stun shadelings and buy you time to escape from them (more on this in a moment). The signal beacon places a large pillar of light that in theory should help your companions find you. In practice it is still pretty difficult to see from a distance.

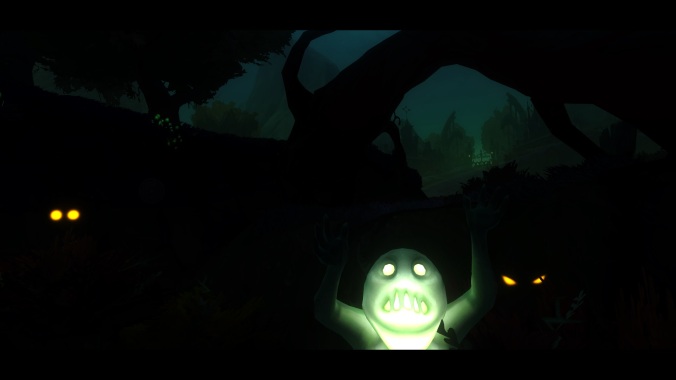
Shadelings are jerks.

Shadelings are jerks.

Shadelings patrol the darkness, and you need to avoid them as best you can. If they catch up to you they’ll turn you into a shadeling too, and you’ll need to use your one ability to attack one of the ghostly humans wandering the woods. Placing an anti-shadeling flare will stun them, but use them wisely since you only get two. Yes, there are more boxes of supplies scattered about, but they are generally not worth the time to open versus just getting the heck out of the woods.

The good-for-nothing Mayor of Quiet Downs

Mayor Goodthorpe. He’s a very bad man.

Once you make it to the fountain, you’ll get your normal abilities back and the rest of the instance is much more normal. Talk to the mayor and two other citizens of the town, and then you’ll be presented with a choice. You can either help the villagers prepare for their “celebration” or you can help Eva Courtly investigate the town. Your choice determines your tasks in this section of the instance. In order to get the achievement for killing all the villagers you will need to do both, and specifically you’ll need to get the attention of all of the patrolling villagers in the “Investigation” pathway.

Your four potential "guests of honor"

Your four potential “guests of honor”

The objectives of both pathways are very clearly marked on your map. As you near the end of this section you’ll have to fight some townsfolk and also the Mayor for the “Helpful” pathway. Once that’s done you’ll be heading down into the underground bunker at the northwest edge of town for the final portion of this expedition.

The last phase of the instance is a straight up dungeon crawl. You need to kill 22 cultists, and have optional tasks to kill the 3 plaguebearers and destroy their equipment. If you’re lower level or undergeared, be sure to pull carefully. The groups of cultists can spawn in slightly different locations and it can be a bit easy to catch too many of them at once. Bringing lots of interrupts is definitely helpful too. If you are alone or with only one friend they will not have interrupt armor which makes things simpler.

Stay away from those bubbling pools of green goo.

Stay away from those bubbling pools of green goo.

You may notice bubbling green puddles on the ground. These will spawn shadelings if you get too close. Most of them can be avoided if you are careful. There’s also plenty of lore to be found on your first time through, so be sure to check out all the hallways if you are interested in filling your lore log!

The man of the hour.

Jack Shade himself.

Once you’ve completed your objectives, it is time to enter the morgue and finally face down “Jack Shade”.  The fight has 3 phases, with bits of dialog in between. If you manage to interrupt most of his abilities the fight is nice and easy. If not, fortunately the Angel will sometimes turn his spells against him and help heal you. After you kill him, he has one last trick in store for you. The whole underground lab is rigged to explode and spread the shades. You’ll have to run straight down the hallway as fast as you can while avoiding the clouds of disease spreading around. Once you reach the end the Angel helps you escape and you’re all done!

Differences between normal and vet: None! There’s currently only one version of this instance. If you’re below level 50, you will get scaled up based on the ilevel of your gear.

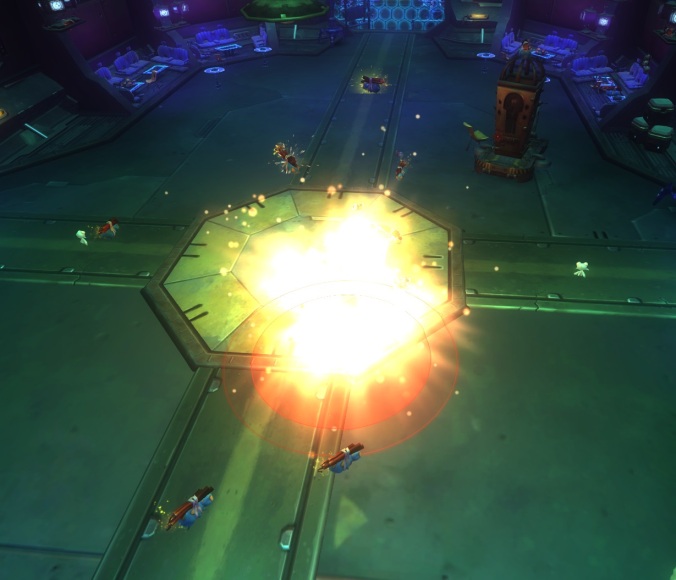
I love the epic feel of the plague tanks exploding around you as you run down this hallway!

I love the epic feel of the plague tanks exploding around you as you run down this hallway!

Other Thoughts: This expedition is quite a lot of fun! While it is technically soloable even on lower level characters it can be difficult to do so. You are much better off grouping below 50. You can run the instance as many times as you like to keep earning goodie bags and shade silver. A gold run will earn you 50 shade silver (62 with the subscriber bonus). Even if you get turned into a shade, as long as you find your way out of the woods in the time limit you can still get gold. You’ll be riding that Shade’s Eve hoverboard around in no time!
Expedition Buddy!

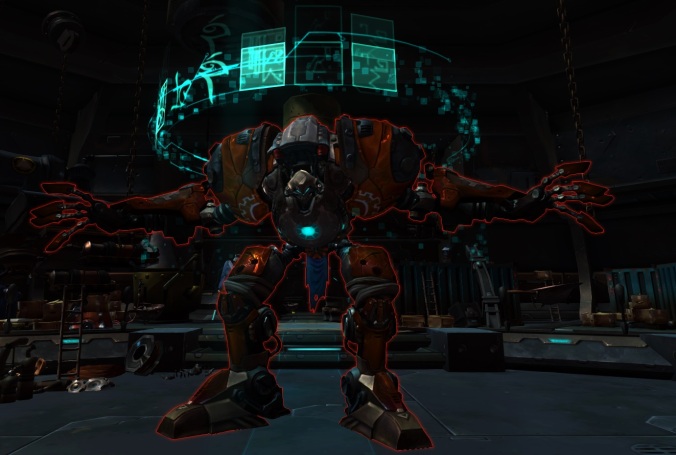
Drop 6 renamed Shiphands to Expeditions. I figure this is a good time to pull all my guides together and remind you that shiphands expeditions are awesome and fun and still one of my favorite things in WildStar!

Introduction and Wrap-Up with useful general information.

Fragment Zero

Outpost M-13

Infestation

Rage Logic

Space Madness

Deep Space Exploration

The Gauntlet

More expeditions are in the works, and I’ll be adding new guides when they are released.

More to come!

Definitely not the end! There’s more to come!


Shiphand Buddy Wrap-Up

Blaugust 2015, Day 27

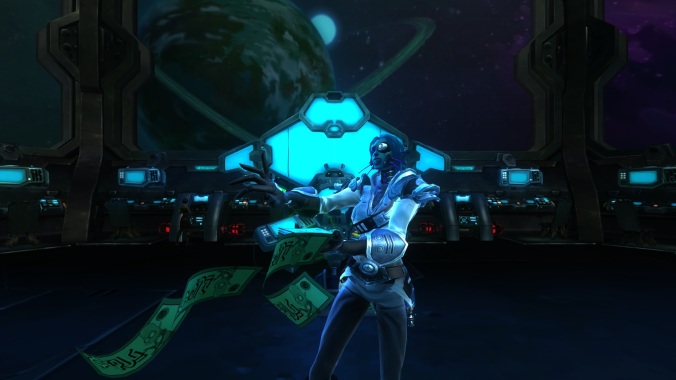
Time for the money

Time for the money

Whew! We made it through all seven shiphand missions! Time to relax and reap the profit. But first let’s hand out some awards:

Most fun: Fragment Zero

Murdering swarms of things is super satisfying, and it also comes with a healthy dose of jumping around in zero-g. Win-win!

Shortest / Best cash per minute: Infestation/M-13 close call

If I just want one or two quick runs Infestation is my go-to, but if I’m chain running I will always throw some M-13 into the mix just for variety. I find waiting around for the hull breach section in Infestation extra annoying if I’m running them back to back.

Most annoying: Gauntlet

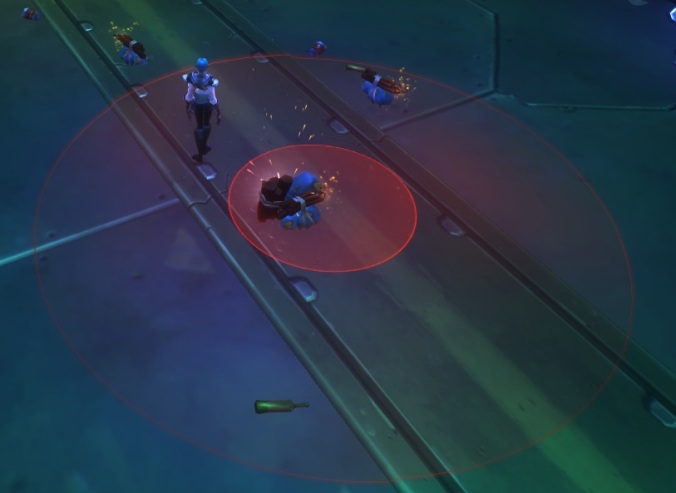
I hate exploding splorg. If the point requirement was a little lower or the timer was a little more relaxed for that section it would be fine. It is otherwise a fairly fun place but I can’t enjoy it knowing how much I struggle trying to get gold.

Yep. Still really hate these guys.

Yep. Still really hate these guys.

Now for the best part of shiphands: making cash money. Sure, the daily quest rewards a little money which is nice, but really the market board and commodities exchange are your best friends. You’re guaranteed one imbuement-type item, which can sell from 5g to upwards of 1p. If you’ve managed to get gold the reward baggie can have some great stuff. Once you’ve collected the dyes and mounts for yourself, throw those extras on the market! Usually the decor doesn’t sell too well on the market, but they do vendor for 1-3 gold a piece so I don’t complain. The runes were my bread and butter for a while, but with F2P and the stat changes looming on the horizon the market has cooled off quite a bit. They will still sell, but prices are very low right now. You can also hold on to them and exchange them for runes of your choice when F2P arrives!

Ooooooh! Shiny new intro cinematics!

Ooooooh! Shiny new intro cinematics!

Speaking of F2P – I did get the opportunity to run a few shiphands on the PTR, and there are some changes to keep in mind. First and foremost, they’ve been renamed “shiphand expeditions” or just “expeditions” in the group finder. All of the older missions have gotten fancy new intro videos a la Fragment Zero, which is a fantastic change. Not so fantastic is the re-tuning of the difficulty. I went in with the most badass raid gear I could buy from the PTR vendor, and the enemies were still noticeably more difficult to kill than they are with my normal gear on the live servers. Supposedly this is still being tuned, so hopefully when the drop launches these will still be closer to the difficulty we’re all used to already. The other big difference is that the rewards are being toned down a bit. Currently running quick shiphands is one of the most profitable pastimes in the game, and that will be less true when these changes happen. I’m disappointed, since I’ve been making a tidy profit from these, but I understand why the devs think this change is needed. I’m looking forward to the F2P transition no matter what though!

I hope you’ve enjoyed this series. I really love the shiphand missions in WildStar for content that is bite-sized and great either solo or in a group. What are you waiting for? Check them out and let me know in the comments which one is your favorite!

Shiphand Buddy: The Gauntlet

Blaugust 2015, Day 25

We made it! This is the 7th and final shiphand mission. Get ready to be a reality tv star!

So many telegraphs, so little health.

So many telegraphs, so little health.

What: Compete in a deadly reality show against your will and escape to tell the tale!

When: Available at level 40

Where: Malgrave

Gold Timers: Normal: None   ; Vet: 20:00

Gracie’s Run Time: Normal: 11:59    ; Vet: 11:55

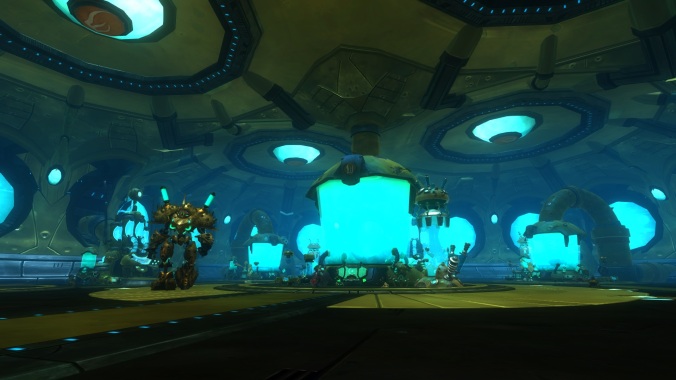
Shiphand Buddy Says: I hope you like dodging things, because this shiphand has an excess of dodging things! Once you speak to Pilot Taboro and start the mission you will be teleported to the chamber pictured in the screen shot above. There are a large number of telegraphs, but only the round ones move. You should be able to find safe spots and dodge them. If you are hit they only do modest damage, so you should be able to recover if you’re careful.

Through this whole mission you will need to be on the lookout for 10 golden skulls. There’s often one inside or on top of the shipping containers directly behind you when the mission begins. Skulls can spawn in any room in the instance, even the connecting hallways. They are frequently located in somewhat hidden places, such as inside containers, behind banners, or under the bleachers in the last room. Sometimes they are on the floor, but often they are floating in mid-air and require a little jumping to collect. Keep your eyes peeled!

To progress to the next section you’ll need to activate 3 control panels in order. From your starting position head to the room on your left first, then the right, and after that you’ll be able to activate the third panel in front of the exit. While you’re in the side rooms make sure to check for golden skulls along the walls, and on top of or behind the large pipes at the back of the rooms.

The gold skulls like to hide in front of these yellow lights above the doors. Tricky.

The gold skulls like to hide in front of these yellow lights above the doors. Tricky.

The next room has a swarm of angry bees, and three waves of small adds. Finish them quickly to minimize the damage you take. Be sure to look for skulls along the walls before you head out to the Chamber of Choices.

This, friends, is how you lose a gold medal.

This, friends, is how you lose a gold medal.

The splorg gauntlet, how I hate thee. This room is where gold medals go to die. You will have to survive a swarm of explosive splorg for 2:00, and collect 20 plushies for “bonus points” while you do it. Getting too few plushies or dying to the splorg will cost you your gold medal. I try to run through the splorg to activate them away from the plushies. Once they start to detonate they stop moving and you should be able to dodge them. For me this objective is probably the most difficult in any of the shiphands. Movement abilities can help you escape the explosions, but if you are really struggling you can bring a friend to make things much easier. When you finish you can endorse a product and wave to your fans. After all that running around I feel like I could use a Protostar Fortified Whim-Beer myself.

Once you’ve survived the splorg, you can choose which challenge to tackle next, either the Charnel Chamber (east) or Faction Friction (west). Both small arenas have a single round of challengers for you to defeat. After completing the Faction Friction arena, make sure to continue through to check the small hallway behind it for skulls. On the eastern side, you can choose to participate in the dance off competition. It doesn’t affect your gold medal, but it is pretty fun! The eastern side also has some extra mobs that you need to kill to save other contestants from the Darkspur. Once all of that is completed you can progress to the final room.

"Brick" Braggor, the dude responsible for bringing you to this awful place. Punch him once for me.

“Brick” Braggor, the dude responsible for bringing you to this awful place. Punch him once for me.

Before you enter the circle in the final room, check if you are still missing any skulls. If you still need some, look around and underneath the bleachers. If you start the event before you get your skulls you will fail that objective. The Main Event consists of 4 waves in total, with a short break between each that should allow you to heal up if you need it. The first two waves are random teams of 2-3 enemies, the third wave will be a single mini-boss. After defeating all of them, “Brick” Braggor himself will challenge you. As you fight him, the other traps of the Gauntlet like electrical telegraphs and exploding splorg start appearing. Save your cooldowns for this guy, because the faster you can kill him the less time you will have to deal with these extra headaches. Once he’s dead you can finally escape this deathtrap!

Differences between normal and vet: On normal mode you don’t have to collect the plushies in the Chamber of Choices. You still have to survive exploding splorg for the same amount of time though. The other difference is that you don’t get to fight “Brick” Braggor at the end, there are just 3 rounds to the Main Event.

Other Thoughts: This is the only mission I can’t reliably get solo gold. The timer in the exploding splorg room is super tight and it is very easy to either not get enough points or just accidentally die in there. I had to run this one four times to make sure I got a gold medal and an accurate run time. If you really want that gold it is much easier if you bring a friend or two. As a bonus the run time was about a minute faster with a buddy to help!

That’s the last shiphand available to date. I hope you enjoyed these guides, and had fun running these missions with me!

Shiphand Buddy: Deep Space Exploration

Blaugust 2015, Day 20

Hello and welcome again to another episode of Shiphand Buddy! Today’s edition is supersized, I hope you’re ready!

Alien abductions you say?

Alien abductions you say?

What: Escape your captors and fix your ship when your exploration mission gets hijacked by aliens!

When: Available at level 32

Where: Wilderrun

Gold Timers: Normal: None   ; Vet: 50:00

Gracie’s Run Time: Normal: 18:24    ; Vet: 21:39

Shiphand Buddy Says:

Bear with me friends, this one’s a doozy! You start in the “prologue” section on your exploration vessel. Simply talk to each of the highlighted crew and head to the bridge to progress. Once you speak to the captain, ikthians appear and abduct you and the crew, beginning the “main” section of the mission.

You awaken inside a containment field. Use your modified action bar to taunt your captor until you annoy it enough to open your cage. Once you’re free, deal with this guy and then turn to help your fellow captives. Each of the 4 containers has a different access code, and entering too many wrong codes will zap and destroy anything still inside. You can still get a gold medal if everyone gets zapped, but can you live with yourself? There is a lore object just outside of this room that contains the codes, which are:

Protostar: 3596

Cubig/misc: 879

Rowsdower: 441

Humanoid: 975

After they’ve been dealt with one way or the other you can use a console to open the next area. I tend to clear everything out of the middle because we’ll be coming back here several times before we’re done. Occasionally you will notice ikthian weapons on the ground, pick them up and use them with CTRL+F1 to advance your objective. You can only carry one weapon at a time so be sure to use them as you find them. The weapon has a random chance of either applying a very strong bleed, a weakness, or backfiring and causing an enrage. Use against strong enemies at your own risk.

Take him out.

There are lots of big guys here.

From the central chamber, I begin with the west path. Along this corridor, keep an eye out for freebot parts. When you reach the room at the end you’ll need to take out two large enemies and a miniboss. Each can be pulled separately and dragged back to the entrance to the room for safety. The miniboss does occasionally patrol around, so be careful. Once the room is clear you can make a quick trip around the perimeter, jamming scrap metal into the engines and collecting freebot parts. There is a table near the entrance where you can assemble the parts back into Clamp, then make your way to the central chamber again.

Rescue everyone from these experiments

Rescue everyone from these experiments

Next we’re heading down the northern hallway. Don’t forget to pick up and use the ikthian weapons along the way. This path opens up into a much larger room where you will need to free crew members from ikthian experiments, mostly by tapping “F” a lot. Note that there are two large enemies that patrol around, make some space to safely take them out. At the back of the chamber is another boss with large telegraphs and a tether attack. Kill him, finish rescuing your friends, and then return again to the central chamber.

Phew, that was a workout, good thing there’s only one path left now! The door to the east will open, and you can follow this route to the captain’s chamber. I usually clear out the spikehordes on one side to give myself some extra room before engaging him. The ikthian weapons will work on him, so you can always try that to help take him down faster, although you do run the risk of it enraging him instead. Once he’s finished you just have one more mob to kill and a game of simon to destroy the ship and activate the escape pods. Hooray! That wasn’t so bad was it?

Hooray! We're outta here!

Hooray! We’re outta here!

Wait, what? This mission is still going? Yep, it is time for the “epilogue”. When the screen clears, you’ll be standing in front of a control panel. Use it, and you’ll take control of a maintenance drone inside the damaged ship. Navigation here is tricky since you are floating in zero gravity. Do your best to avoid the drifting debris, and head out of the room and down the hallway. There are 6 life support panels to activate in the large room, and two more in the smaller room on the lower right hand side. You must be close to the panel, target it, then press “1” to activate it. If you take heavy damage you can move to a charging station and use your “2” ability to repair. Losing all your health will transfer you back to your body, and you’ll have to interact with the panel again to take control of another drone.

Positioning the camera overhead makes the path much clearer

Positioning the camera overhead makes the path much clearer

Ok life support’s back up, time to open the hatch and get out of here. Seriously? There’s still more to do? Fine, I guess we can go and fix the gravity. Make your way across the room, and target the hookfoots (hookfeet?) and use your “T” ability on them to freeze them. Avoid the vents along the walls which occasionally send out a freezing blast. Keep following the path until you reach the laser grid. The beams probably won’t do enough damage to kill you, but they will bounce you around and annoy you. I usually turn my camera so I have a top-down view here, which makes it easier to see the gaps. Double jump is your friend, as is the pile of junk on the left side which you can use to bypass some of the beams. Reaching the end of the hallway will deactivate the lasers. Then you can jump up the junk pile again and into the next room.

Here we’ll meet the last enemy of the mission. He has the same large telegraph moves as the rest of the big ikthians we’ve already dealt with. Fun fact: if you happen to save an ikthian weapon, you can use it against this guy too! Once he’s down you just need to make your way around the room to seal off the 5 valves along the walls, then hit the switch on the floor to fix the gravity. Finally! All done!

Wait. OH *BLEEP* NO. There’s more? Leave the engine room and head down the hallway to the main chamber. Oh. Hey. They threw us a party! Congratulations, we’re finally finished!

Differences between normal and vet: There’s very few differences here. On normal you don’t have any ikthian weapons, which could be a blessing or a curse depending on your luck. There are also no lasers to jump through in the final section on normal mode.

Other Thoughts: This is the longest of the shiphands. I was honestly surprised that the run time on this one is only a couple minutes longer than Fragment Zero, because it feels significantly longer. I am constantly wishing it either had one less wing on the ikthian ship or that it would just end when you reach the escape pods, since that feels like a natural place to stop. Also of special note, the section where you pilot the repair drone can be particularly awful if you are prone to vertigo or nausea. Fun times!

Even after all those complaints, this one still manages not to be my least favorite. That title goes to our next shiphand mission. Tune in again to see me complain about our 7th and final (for now!) Shiphand Buddy mission: The Gauntlet!

Shiphand Buddy: Space Madness

Blaugust 2015, Day 18

Welcome back for another episode of Shiphand Buddy! Today’s mission is a cautionary tale about breathing dangerous chemicals.

Space Madness is very colorful, and deadly.

Space Madness is very colorful, and deadly.

What: Stave off Space Madness and cleanse the ship!

When: Available at level 30

Where: Farside

Gold Timers: Normal: None   ; Vet: 35:00

Gracie’s Run Time: Normal: 7:25   ; Vet: 8:22

Shiphand Buddy Says:

Buy a drink from a talking spider? Seems legit!

Buy a drink from a talking spider? Seems legit!

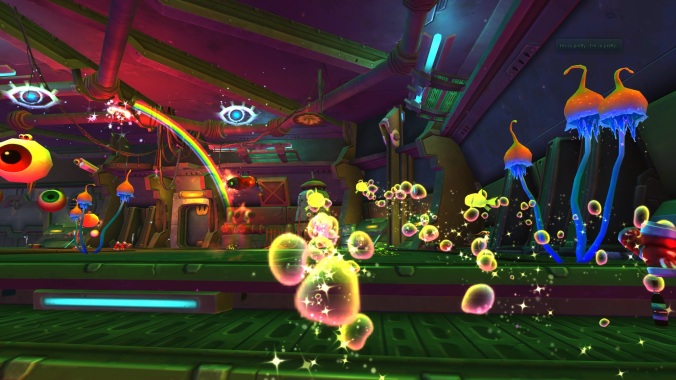
Space Madness is broken up into a few sections. First up you will have to progress through the ship, collecting datapads and rescuing survivors. The mechanic here is that you have a sanity meter to keep track of. It starts at 100 and ticks down as you spend more time in the contaminated air. You can use the air canisters scattered around to counteract this effect but there’s a catch: the three creatures you need to find for your gold medal objectives can only be found at different stages of “madness.” From 80-60 (“You don’t feel quite like yourself”) you’ll be able to find the slank, 60-30 (“You feel quite delusional”) the rockmite, and below 30 (“You have gone quite mad. Ooooh, rainbows!”) the dawngrazer. Each transition brings about changes to the environment, and different enemies will appear. I tend to use the air canisters once or twice at the beginning to avoid fighting through excess monsters during the phase transitions. Be careful not to use the canisters too much, however, or you’ll be sitting around wasting time waiting for the critters to appear before you can move on to the next area.

Go away Exact Change 3.1, I'm not thirsty

Sorry Exact Change 3.1, I already filled up on drinks from the spider guy…

There’s one more datapad to find in this room, and then you can access the spacesuits. If you are feeling adventurous, you can also buy some lemonade from a friendly spider (along the wall on the left as you enter). Once you hit the access panel you’ll be knocked out for a few seconds. When you return you’ll face 3 waves of adds followed by the vending machine mini-boss. Keep an eye out for his “Self Service” ability and interrupt it if you can. It is a substantial self-heal that will make the fight drag on if allowed to succeed. Once you finally defeat him you can grab a spacesuit and move along.

Exploding livestock. Avoid at all costs.

Exploding livestock. Avoid at all costs.

The next area is often the part that ruins a gold run for folks. In this section you have to contend with hallucinating crew and livestock, all while avoiding exploding rowsdowers. It pays to be patient, there are some safe spots that the rowsdowers avoid if you watch them long enough to see their patterns. Pull enemies back to safe areas so you don’t have to worry about fighting and dodging explosions at the same time. Be aware that sometimes the crew members you try to help will turn hostile too, so clear some space before you talk to them. Finally, if you do trigger an explosion dodge out of it if you can. You absolutely can still get a gold medal if a rowsdower explodes as long as you do not get caught in the explosion. You just have to react quickly.

Facing off against the inferno boss

Facing off against the inferno boss

Once you make it to the final room you can turn on the air scrubbers and begin the last event. Waves of enemies will spawn and must be defeated until you are left with the final boss of the mission. The last boss is random, you can tell which one you are getting by the color of the distortion in the room as you are fighting the earlier waves. Electricity means you’ll be fighting the construct boss “Thunder Surger”, fire means you’ll get “Inferno Intensity”, and darkness leads to “Decrepit Atrocity”. They each have one annoying cc-type attack, either knockdown, blind, or disarm, respectively. Otherwise it doesn’t matter much which one you get. Kill it, activate the console at the back of the room, and pat yourself on the back for a job well done!

Differences between normal and vet: The huge difference between the normal and veteran versions is that on normal you don’t have to collect the 3 critters. This means you don’t have to descend completely into madness in the first section and can progress much faster. The other major difference is that there are no exploding rowsdowers to dodge, which makes that section very easy compared to vet.

Other Thoughts: I think the “madness” mechanic is interesting and spices up an otherwise pretty standard instance. I like the art style and the strange things that appear for you to fight. I do recognize that this mechanic can be problematic or unsettling for some folks. The good news is that if you don’t enjoy it there’s not a lot of reason to run this one unless it is the daily.

That’s all for today. Come back next time for Shiphand Buddy’s longest mission: Deep Space Exploration!

Shiphand Buddy: Rage Logic

Blaugust 2015, Day 13

Welcome back to Shiphand Buddy! This installment will have us running over robots with the family car and facing off against an evil AI.

What: Help some lovable freebots stop the spread of the Rage Logic virus!

When: Available at level 26

Where: Whitevale

Gold Timers: Normal: None   ; Vet: 25:00

Gracie’s Run Time: Normal: 7:46   ; Vet: 9:58

Shiphand Buddy Says: This mission is broken up into 2 main parts. First you’ll need to choose a vehicle for the outdoor portion. Your options are Rail Gun, Electro-Magnetic-Pulse, and Rocket Launcher Speeders. I always go with the EMP Speeder because it looks fun, but it is mostly down to personal preference, since they only differ in one of their 4 main attacks. You can try each of them to see their different abilities before you begin, the timer doesn’t start until you head outside. Once you’re ready, drive straight out the airlock to begin your adventures in robot slaughter.

Take your choice of these lovely, deadly vehicles!

Take your choice of these lovely, deadly vehicles!

Once outside you have 4 goals. First, remember ABROR: Always Be Running Over Robots! You’ll need to hit 100 of them with your shield (action button 1 on all vehicles) along the way, so make sure to keep it up as much as possible and get lots of practice playing bumper car. I try to avoid using my other weapons until I’m close to being finished with this part. As you’re cruising around, you’ll notice three big yellow engines you can click on. This will lob bombs at them, progressing the next objective. All around this outdoor area, but especially around the crater in the middle, there are scanner bots that need to be destroyed. They are patrolling and floating up in the air, so you’ll need to use a ranged attack to hit them. When in doubt, check your map. The scanners will show up as targets so you can find them easily as they wander.

Follow this path to kill the overseers. Or don't, I'm your buddy not your boss.

Follow this path to kill the overseers. Or don’t, I’m your buddy not your boss.

The final objective for this section is to kill all 3 Overseer bots. These spawn in fixed locations after you’ve killed a large amount of the regular bots, and they must be killed “simultaneously.” The intent is that you would have multiple people spread out to take them down at the same time, but if you’re a loner space cowboy I’m gonna help you take them down solo. Attacking them with your regular vehicle weapons is too slow, but we have a secret. You didn’t forget about ABROR did you? Put up those shields and run over those overseers! You can take them out in about 3-4 hits this way. As a bonus, if you are moving when you put the shields up you will get a short burst of speed to help you get to the next bot faster. I start at the one closest to the entrance, and finish at the one near the cave. Since they always spawn in the same locations it is easy to memorize the path between them and run them over in a hurry. Don’t fret if you fail, they will respawn and you can keep trying.

Now that you’re done with those objectives, it is time to head inside the bot hideout and stop Axiom’s transmission of the Rage Logic virus. Kill hostile bots along the way, but avoid the neutral ones if you can. You’ll want to attempt to reprogram 3 of these for your objectives. If you’re lucky, they’ll turn friendly and help you fight for a short while. Otherwise they will turn hostile and you’ll need to put them down. Make your way to the lower floor and get ready to wreck the place.

This stuff looks important, better break it.

This stuff looks important, better break it.

In the central room, be wary of patrols. There are multiple aggressive bots that wander in and out from the other areas for you to deal with. You will need to destroy 6 pieces of equipment, 2 in each of the main rooms on this level. I usually go right and then left, since the left room is also where you’ll have to destroy the Broadcast Transmitter. Oh did you think that was some sort of equipment to smash? Nope, it’s a giant bot that wants to smash you! Stay light on your feet or quick with your interrupts and he should be no trouble. Be aware of the neutral bots around this room and avoid tagging them during the fight.

Wreck this jerk.

Axiom. Wreck this jerk.

Once all the equipment is toast you can head to the last small room to open the way to the final boss. There’s a Simon game with a pattern of 6 colors here, either beat it or use an addon to do your work for you if you’re lazy like me. After stepping through the portal and killing just a few packs of normal mobs you’ll be face to chassis with Axiom. He’ll put up a large shield at the start which you’ll need to destroy, after that it should be smooth sailing. Just remember your interrupts and use the health packs on the floor if you need them and you’ll reduce him to scrap and save the freebots!

Differences between normal and vet: Normal mode doesn’t ask you to run over bots (but you should do it anyway, it’s so satisfying!), and there’s no Broadcast Transmitter to kill.

Other Thoughts: This one frustrated me until I finally learned how to solo the 3 overseers. It is pretty middle-of-the-road in terms of time, but it has a lot of charm. Who doesn’t love freebots?

Tune in next time for Space Madness!

Shiphand Buddy: Infestation

Blaugust 2015, Day 11

Welcome back to another episode of Shiphand Buddy! Today we’ll be trying our hand at space salvage and, of course, fighting weird space monsters.

This green gas doesn't look very good for your health.

This green gas doesn’t look very good for your health.

What: Find the source of the infestation and get out alive with your salvage!

When: Available at level 17

Where: Galeras, Auroria

Gold Timers: Normal: None   ; Vet: 18:00

Gracie’s Run Time: Normal: 4:49   ; Vet: 6:55

Shiphand Buddy Says: I have seen an awful lot of this place, but I still really like it. It’s quick and easy! Take your time in the first room, kill the creatures and then seal the three vents. As you progress through the rest of the instance, remember that creatures can spawn from the round vents in the floor, as well as occasionally from cargo crates when you loot them.

If you proceed carefully in the next room it can make your life a lot easier. Clear the wandering patrol and mark the crate on the center platform. DO NOT go down the ramp yet. Mark the crate on the right, and walk out on the ledge there as far as you can. Do your best to aggro the mobs below you with any ranged attacks you have, then run back to the main upper platform to fight them. Be careful not to fall down onto the ramp! You can aggro the other pack either from the upper middle platform or by very carefully inching down the left ramp and attacking until you can just hit them with your longest range ability.

Why go through all this trouble? Once you move down the ramps an event will start with crew members being sucked out of hull breaches. You have a very short timer to find the breach and seal it before the crew and your gold medal get sucked off into space and lost forever, so clearing those creatures out before the event starts can make a huge difference. If you can’t do this, you’ll have to work on clearing them out in between the hull breaches.

I like to sit in the middle and spin my camera until I spot the next breach and then dash to seal it. If you have an addon that shows nameplates for interactive objects you can see all the possible breach locations and keep an eye on them. Any movement abilities you have will help a ton here as well. Once the event is complete make sure to tag the last crate in this room, up on top of some shipping containers. Be warned that more adds can spawn from the floor vents once the event is over.

After that the rest of the instance is a piece of cake. Make your way down the hall, killing creatures and tagging the last of the cargo before you get to the med bay. When you head toward the supplies in this room a short event begins. Kill a wave of infected crew, then a wave of 3 infection monsters. When they are near death they will run back to the middle and merge into a miniboss. It has a fair amount of health but otherwise isn’t too bad. Once you kill it you can finally loot those medical supplies. Note that there’s poison gas in the lower area during the event, if you are struggling to kill everything fast enough try pulling to the top of the stairs first.

These blob monsters are pretty gross.

These blob monsters are pretty gross.

The lights will go out momentarily during the transition to the last stage of this shiphand. You will need to fight your way back up to where you started, killing blobmonsters and “saving” the crew along the way. Each time you use the medical supplies on a crew member they’ll explode into multiple little mobs, so be prepared. Once you’ve found them all and killed all the monsters you’re ready for the final showdown with a giant gross disease creature. Partway through the fight it will hit you with a blind attack. If you’re prepared you can interrupt right away to avoid taking unnecessary damage while you’re blind. Once it dies you’re done!

Differences between normal and vet: Normal mode has no cargo to collect and no event/miniboss in the med bay area.

Other Thoughts: This is usually considered the fastest shiphand if you just want to do some speed runs, but you’ll want some practice to get used to the hull breach section first.

Next up: Rage Logic!

Shiphand Buddy: Outpost M-13

Blaugust 2015, Day 6

Welcome back to another episode of Shiphand Buddy! Today we’re exploring Outpost M-13.

Don't let that monkey steal your precious crystals!

Don’t let that monkey steal your precious crystals!

What: Stop whatever is terrifying the poor miners of Outpost M-13

When: Available at level 13

Where: Algoroc, Celestion, Deradune, and Ellevar

Gold Timers: Normal: none, Vet: 20:00

Gracie’s Run Time: Normal: 4:40 , Vet: 8:20

Shiphand Buddy Says: This is a nice quick and straightforward mission. First up is the cargo hold. Enemies will come in pairs, one to shoot you while their buddy steals a crystal. As long as you get a hit in on the thief he’ll run back toward you, so you should be able to prevent them from stealing anything. They spawn on alternating sides of the room, so use movement abilities to switch between them if necessary. One trick I use is to let the first plunderer on either side actually pick up a crystal. They drop their crystals where you kill them, so the later waves will have to move closer to the center before they can start stealing, giving you more time to deal with them. Once you’ve killed enough a mini-boss spawns. Remember you can dash to get out of his knockdown, and make use of the health packs that can spawn around the area.

Charge Locations. They spawn in the same place every time.

Charge Locations. They spawn in the same place every time.

Next you head out to the surface, where you can zero-g jump to collect all the floating charges. If you are careful you can grab all of these without having to fight anything at all. Once you have all 10, head inside and talk to the foreman there to start the next section. There are more than enough bodies to loot for datachrons for this part. Just be careful to clear around them first as they will always spawn multiple critters when you use them. If you saved enough crystals in the first part you’ll have a team of mercs who will fight their way through ahead of you, clearing a bit of a path before they eventually get overwhelmed.

When you head back outside a ship will land and spawn 2 waves of adds and then a miniboss. As a spellslinger I like to position myself off to the side before they spawn to help line everyone up nicely in my telegraphs. The miniboss himself is quite easy and once he’s dead you can head into the cave for the last section.

Big bad mother.

Big bad mother.

Inside, kill bugs, infected miners, and eggs until the queen spawns. I usually clear a little extra to give myself room to move around for the boss fight. She can be a bit of a pain but if you can keep her interrupted she can’t stun you!

Differences between normal and vet: No floating charges to gather in normal mode. The Captain Wiko event is Vet only.

I found the love bug.

I found the love bug.

Other Thoughts: If this is your first time running, or if you love adorable bugs, make sure to check out the easter egg at the end of the mission. In the last room there is a staircase on the left side. Once you’ve killed the queen, head upstairs to find the lonely lost larva for an achievement!

Shiphand Buddy: Fragment Zero

Blaugust 2015, Day 4

Welcome to our first installment of Shiphand Buddy! Are you ready to face the dangers of Fragment Zero?

I love the retro sci-fi theme of the introduction to this one

I love the retro sci-fi theme of the introduction to this one

What: Unlock the secrets of a creepy skeech-filled asteroid and save the Ekose captain

When: Available at level 6

Where: Quest givers are in Algoroc, Celestion, Deradune, and Ellevar

Gold Timers: Normal: None;   Vet: 30:00

Gracie’s Run Time: Normal: 12:58  ; Vet: 17:59

Shiphand Buddy Says: This is the newest shiphand and it has some nice touches like cute old-school sci-fi themed cutscenes and a story that ties into the world story a little more than just “some folks went into space and bad things happened to them.” The vet gold timer can be a little tight if you are new or if your dps is on the low end, but once you’re used to where to find everything you should have a few minutes of cushion.

There are 3 tunnels, you go left first, then right, then finally straight, before returning to the start again. The black box you need to collect can spawn in several random locations. I like to check the spot on the right side right after killing the first skeech waves at the start while I am close. The first tunnel has a strain infestation. There’s 3 fairly obvious big strain creatures to kill before you can find the missing crew member and move on. Make sure to kill the xenobite eggs along the walls for your gold medal.

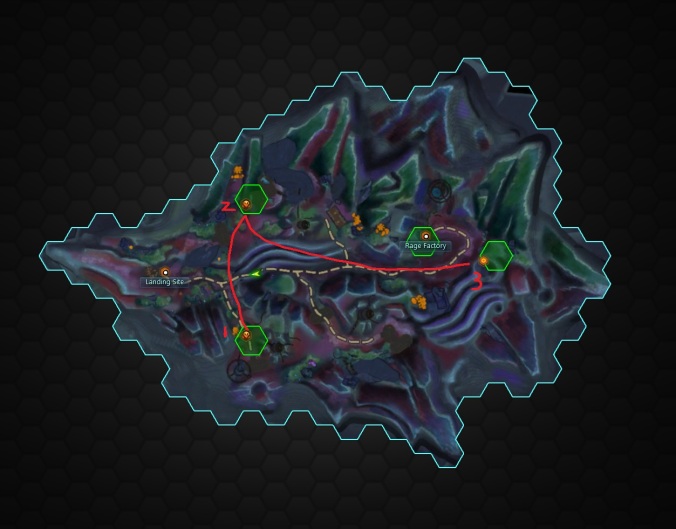
Lines show my approximate path. Dots are possible Black Box locations.

Lines show my approximate path. Dots are possible Black Box locations.

When you exit the first tunnel, you need to gather cargo. By far the fastest way to do this is to kill the “Looter” skeech, which drop many crates at once. I usually clear the area immediately to the left as you exit the tunnel, since there are several looters up there and one of the black box spawn points is up there as well. If I get all my cargo and still haven’t found the black box I check the last location before entering tunnel number 2.

The second tunnel is full of skeech, be wary because more waves will spawn behind you as you progress. To get gold, you need to use 3 panels in this tunnel to shut down the defense system. The first is down a side passage on your left after the entrance. The second is nearby on the elevated area. The third is on a cubby on the left in the last room. Kill the skeech matron, find the missing crew member and fight your way back out.

I try to skip as much trash as possible on the way to the last tunnel, usually heading immediately right after exiting tunnel 2 and using the zero-g plus my movement abilities to bypass the skeech up in that hilly area. If you have around 80% of the “kill skeech” target met when you enter the last tunnel you should be on track to complete it for your gold medal.

The last tunnel is a pretty straight shot to a mini-boss. Just dodge and/or interrupt and he shouldn’t give you any trouble. There’s some lore all the way in the back if you’re a collector! Rescue the ekose, wait for him to do his thing, then run back outside. The final bit is just silly fun. Stay in the bubble, watch out for telegraphs, and kill a whole lot of skeech!

Skeech? Skeech!

Skeech? Skeech!

Differences between normal and Vet: There’s no timer and no black box to find on normal, and no minimum number of skeech to kill to get gold. There’s also no “Looters”, so you have to loot 10 crates off the ground.

Other thoughts: This isn’t the fastest, but it is a great choice for finishing some contracts. You can easily knock out “kill skeech”, “kill strain”, “interrupt telegraphs”, and “get multi-kills” in this shiphand.

Shiphand Buddy returns on Thursday with our next mission: Outpost M-13!